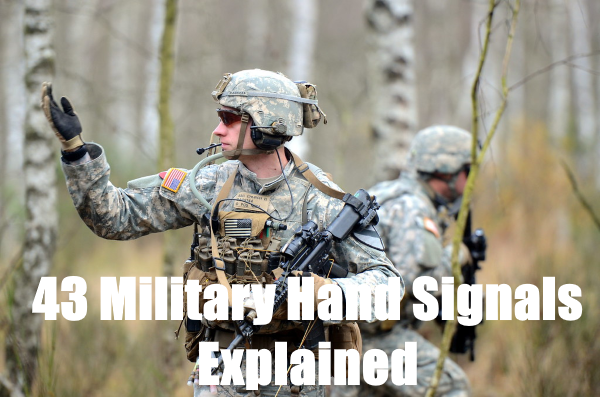
Sometimes, verbal communication just doesn’t work in the military. Whether it be because an enemy is nearby, or you simply don’t want the enemy to know you’re there, sometimes it’s best to get your point across using hand signals.
Check out the below military hand signals, and learn what each one means, as well as how to make the hand signal.
Note: Click Here for a free downloadable PDF.
Table of Contents
33 Military Hand Signals Explained
#1. “Ammunition”
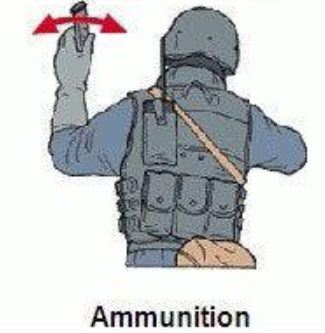
The ‘Ammunition’ hand signal lets others around you know that you are in need of another magazine of ammunition. You might use this hand signal if you’re low or completely out of ammunition.
Take an empty (or partially empty) magazine, place it in your left hand, hold it at about eye level, and motion the magazine back and forth from left to right.
#2. “Breacher”
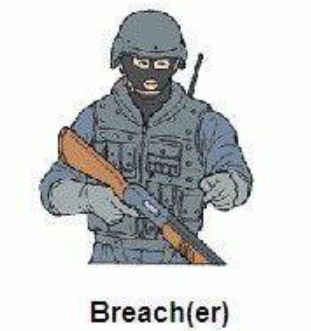
This command is used to determine who will be the “breacher” or point man. They will be the first through the door/doorway and begin the process of clearing the room/area.
When at the point of where the breach will occur, point a single finger at the person who will lead the breach and then everyone gets in line around them.
#3. “Cell Leader”
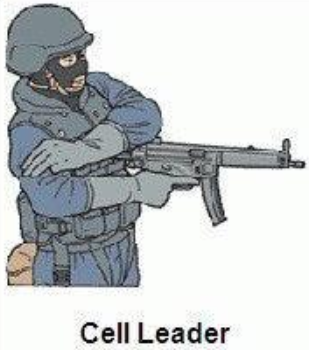
This command is used to clarify who the leader of the fire team/group is. The leader is the one who decides the course of action they take during movements and in a fire fight.
Extend your middle three fingers, tucking the thumb and pinky behind them, and place them on the bicep of the opposite arm.
#4. “Column Formation”
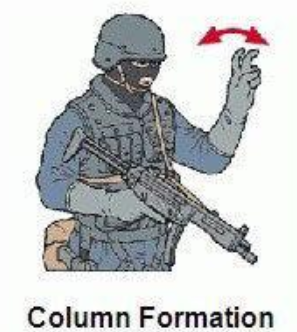
This command tells the groups to change their formation and form two columns.
Holding your hand at eye level, extend you pointer and piddle finger. Move them closer and father from each other.
#5. “Come”
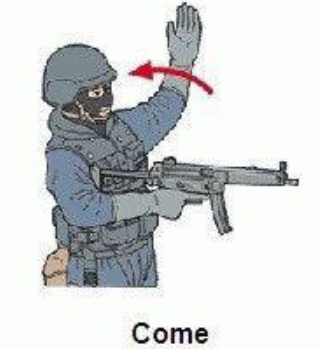
This command is to instruct an individual, or a group, to come to you. You can specify a person individually if you point to them before the command.
Make the hand signal “stop” but face the palm to you. Wave the hand back and forth to and away from your face.
#6. “Cover This Area”
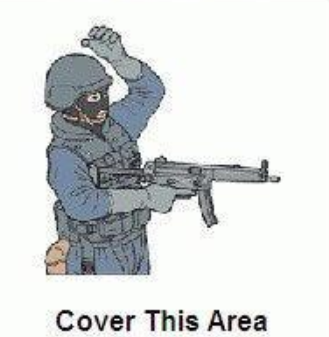
This command is to inform the other person(s) to cover a specific area.
With your hand above your head point and notion to an area.
#7. “Crouch or Go Prone”
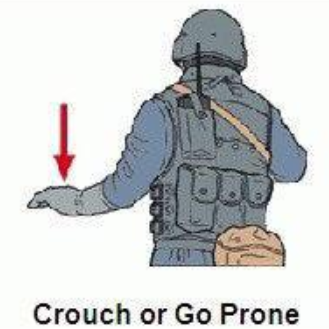
This is to inform those behind you that they are to get into the prone position.
Fingers facing forward and palm to the earth, fan your hand as if to signal ‘down’.
#8. “Dog”

This is to inform those around you that a dog has been spotted or heard.
Drop your arm down and slightly in front of you. Put your hand in a position as if you were holding a ball, fingers pointed to the sky
#9. “Door”
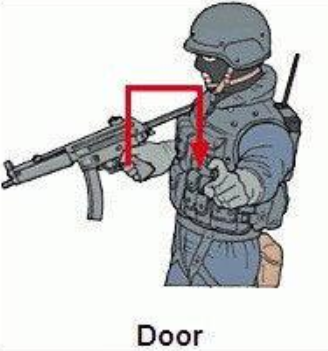
This is to tell those around you a door has been spotted.
Use your pointer finger to draw a three sided rectangle in the air. Do not draw the bottom line, that would be the sign for window.
#10. “Enemy”
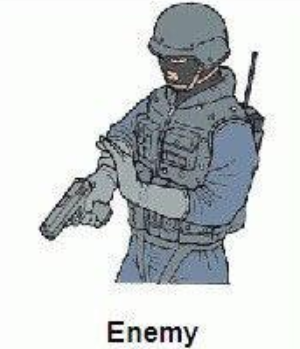
This signal is used to let the entire team silently know an enemy has been sighted. There are several variations of this. Below are the two most common.
Face to the enemy and make a circle with the pointer and thumb. Point the other fingers, extended, at the enemy.
Face the enemy and make an upside down “gun” with your thumb and pointer finger. Point at the enemy.
#11. “File Formation”
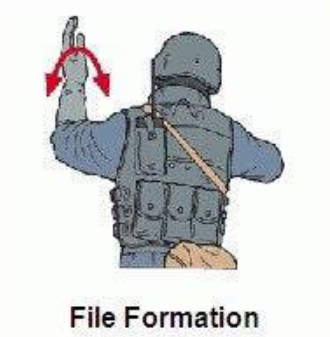
This command is to instruct the team to change their movement in to a single file formation. This can be due to terrain, to leave less of a trail to follow or to avoid dangers such as IED’s.
Make a knife hand, (all fingers extended straight out and touching each other) and bend your arm at a 90 degree angle, your bicep being level with your shoulders. Palm facing you, pivot your arm at the elbow straight ahead, as if pointing rapidly with your entire hand.
#12. “Freeze”
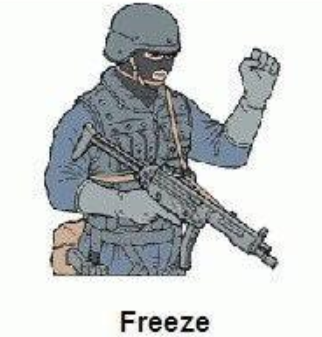
This command is for when you need the entire group to stop immediately. This differs from “halt” because you want an immediate action, not everyone to slowly come to a stopping point.
Make a fist and put it eye level.
#13. “Gas”
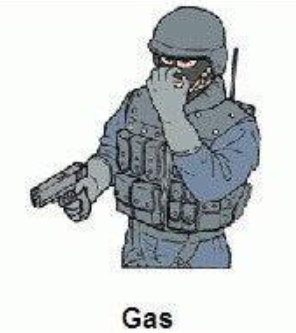
This command tells others that gas has been spotted/detected. After this they will usually begin putting on the gas mask.
With an open palm face the person you’re talking to and cover your nose and mouth with your fingers, your lower palm resting on your chin.
#14. “Go Here or Move Up”
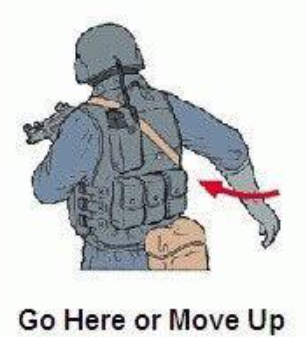
This tells those behind you to move up to your location.
With an open hand, wave forward staring from behind you and stopping when you get to your body.
#15. “Hostage”
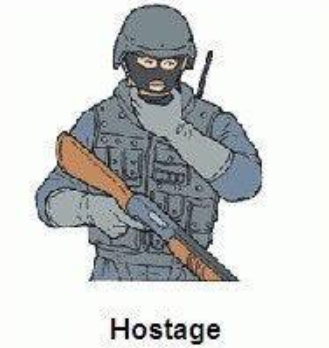
This is to alert the team that a hostage has been taken by the enemy.
Face the person(s) that you are communicating to and grab your throat.
#16. “Hurry Up”
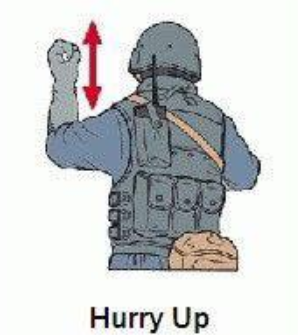
This is used to inform the team to hurry the pace, quicken their movements.
Face the team, or as many as you can and make a fist, your arm bent at 90 degrees. Your fist should be by your head. Pump the fist in the air rapidly. It should move up and down about 6” from the starting position.
#17. “I Don’t Understand”
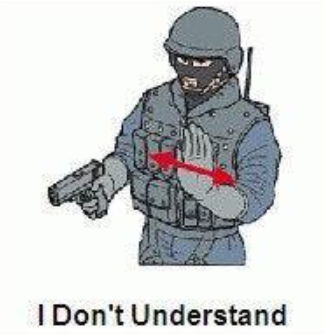
This is used when you did not understand a silent command given to you. It tells the person you are communicating with you need to see the command again, or you need further instruction to complete their order.
Face the person giving you the command and hold your palm up to them, as if you are saying stop. It should be chest level. Move your hand side to side. (Unlike the picture, do not aim the weapon at them!)
#18. “I Understand”

This command is to let the person who just gave you an instruction or command that you did understand what they ordered.
Take your arm, hand near your face, and connect your thumb and pointer finger together. Extend the other three fingers making the “OK” hand symbol.
#19. “Line Abreast Formation”
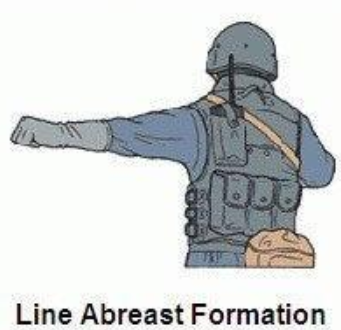
This is to change the movement type the team around you is doing. You are directing them to for a specific line formation.
Make a fist and extent your arm all the way out, arm perpendicular with the ground.
#20. “Listen or I Hear”
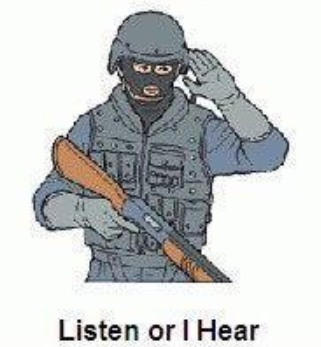
This command is to tell the group that either they need to listen or that you heard.
Point to yourself and then extend all your fingers together. Palm facing forward, pit the hand behind the ears, fingers touching he ear.
To say listen:
Follow the second half of the command with your hand behind your ear, or point to someone and then do the command.
#21. “Me”

This command usually is a precursor to another command. You are communicating to the other person that you are the one who will do something. So for example, you might do this command and then the breacher sign to signify that YOU will be breaching.
Close all your fingers in your hand and extend your pointer finger. Point directly at your face, your hand in front of you.
#22. “Pistol”
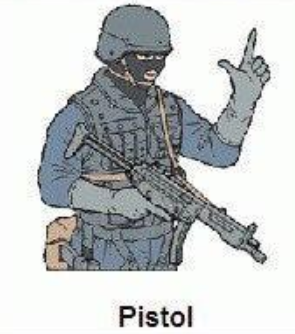
This tells the team that a pistol has been positively identified in the battle space.
Make an “L” with your thumb and pointer finger. Hold this eye level.
#23. “Point Of Entry”
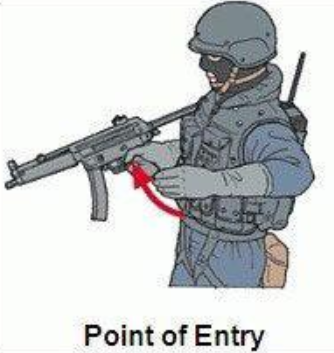
This military hand signal indicates a point of entry to a room, building, or other enclosed area. The point of entry is where the team will enter into one of the above.
With your left arm raised to chest level, motion your arm from left to right.
#24. “Rally Point”
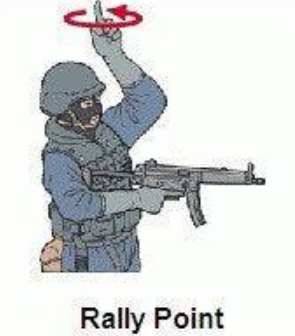
This command is to tell the team that the current position, or the one you point to right before this command, will be the next rally point. That means that the team is supposed to regroup at that point, usually for further orders or a break in the movement.
Point to the sky with your hand slightly above your head. Move your hand in a circular motion (direction doesn’t matter).
#25. “Rifle”
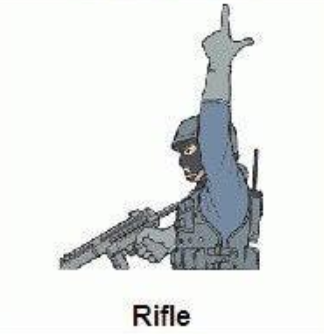
This is to inform others that a rifle has been positively identified in the current battle space.
Make the “L” with your thumb and pointer finger and extend your hand above your head, your arm should be straight.
#26. “Shotgun”
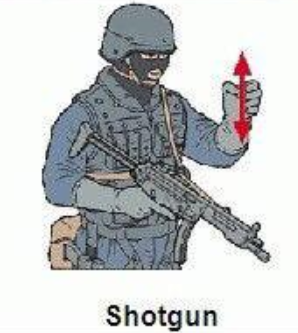
This is to inform those around you that a shotgun has been positively identified in the battle space.
Make a fist and hold it chest level. Rapidly lower and raise the fist about 6 inches down and 6 inches up. Take a pause and then do it again.
#27. “Sniper”
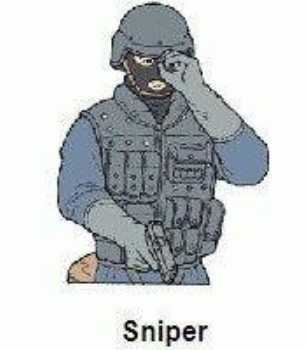
This is to inform the team that a sniper has been identified in the battle space.
Make a circle with your fingers and bring them up to your eye (Like it’s a scope)
#28. “Stop / Halt”

This command is to tell the team to stop the movement or action. It can be done two different ways, depending on the different scenario.
Put your arm extended out behind you, palm facing those behind you. Extend and separate your fingers, signaling to stop.
Alternatively, make the same hand gesture but do it eye level next you your head.
#29. “Vehicle”
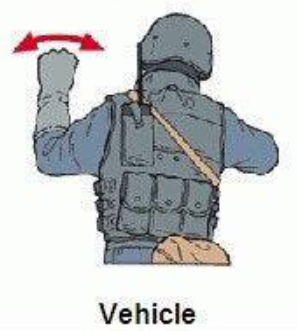
This command lets the team know that a vehicle is coming or has been spotted.
Make a fist, knuckles pointing back and fingers forward. Move the fist left and right.
#30. “Watch or I See”
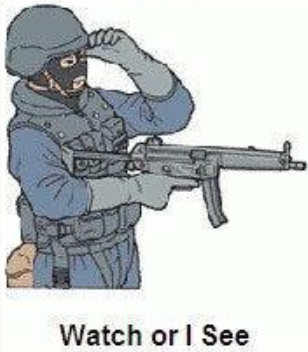
This is to tell a teammate that you want them to watch you, or to say I see you, depending on the context.
Look directly at the person you’re communicating with and point directly into your eye
#31. “Wedge Formation”
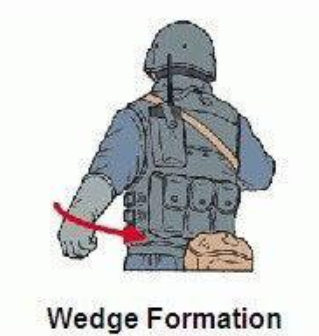
This tells the team to change the formation to a wedge formation.
Make a fist and let your arm extend down to the ground. Move your fist from the outside of your body in-word.
#32. “Window”

This gesture tells the team that you have spotted a window worth informing them of.
Use your pointer finger and draw a square, about 4-8 inches long.
#33. “You”
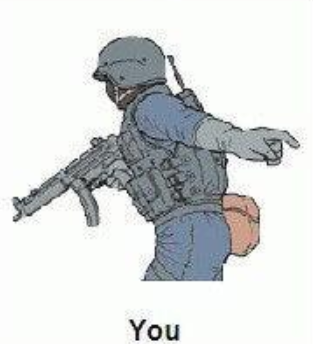
This command is to specifically communicate to an individual person. It is usually used as a precursor to another command. “You” then “breach”. Telling them that that individual is the breacher.
Ball your fingers into your hand and extend the pointer, pointing at the person you are communicating with.
Military Hand Signals for Numbers
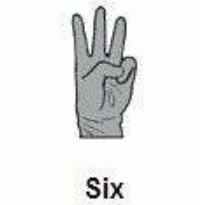
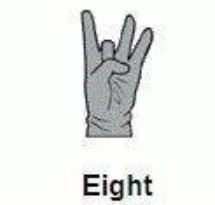
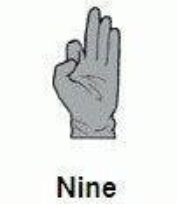
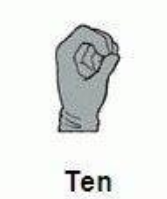
Numbers are important to communicate for a variety of reasons. You may be signaling the number of enemy ahead, or the range of something in the distance.
“One”

“Two”

“Three”

“Four”

“Five”

“Six”
“Seven”

“Eight”
“Nine”
“Ten”
References / Resources
See Also
- Ikon Pass Military Discount: Learn How To Save Big - January 31, 2025
- RTIC Military Discount: Find Out How To Save Big on Gear - January 30, 2025
- Traeger Military Discount: Learn How To Save Big on Smokers - January 28, 2025

